> ## Documentation Index
> Fetch the complete documentation index at: https://docs.lantern.is/llms.txt
> Use this file to discover all available pages before exploring further.
# Use the checkout extension
> Step by step instructions for using the Referral checkout extension
***
Supported pages: **Thank you**
Minimum required Shopify plan: **Basic Shopify plan or higher**
***
## Overview
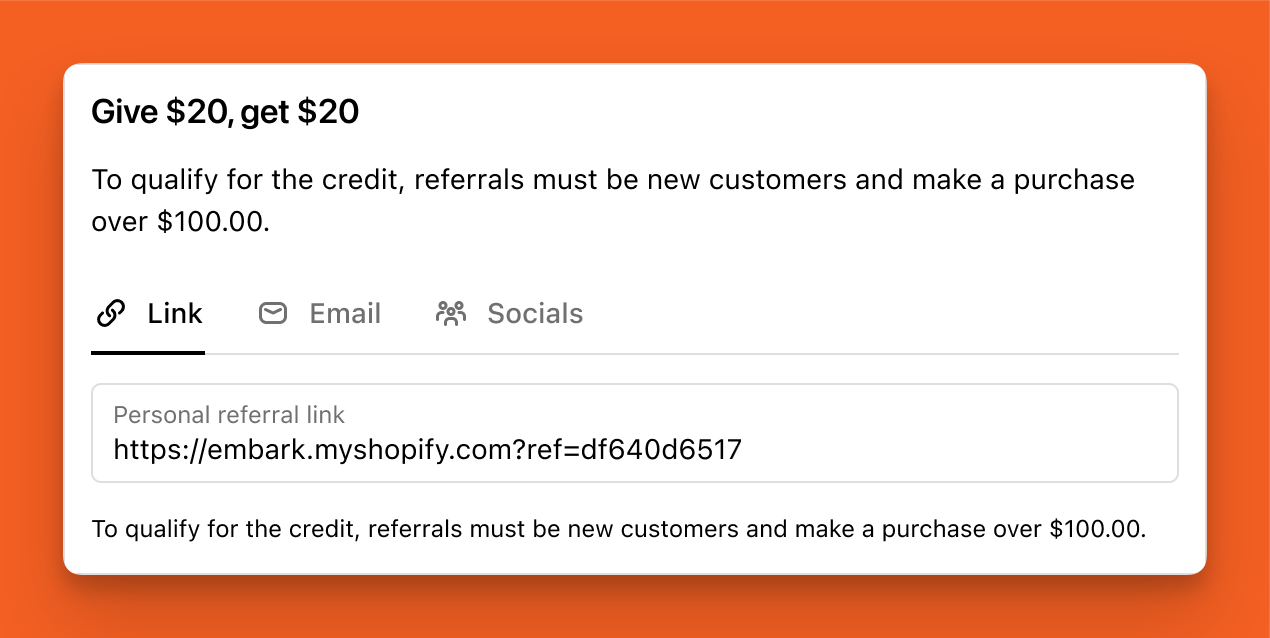
Lantern's Referral checkout extension is a great way to encourage customers to share a referral when they're most incentivized to do so — right after they place an order. This article will walk you through how to install the Referral checkout extension on your store.
 **Make sure your Referral program is set up before getting started.** Configure the program in the Lantern app first. You can keep it in draft mode while you customize the extension. [Get started with Referrals](/help/referrals/getting-started)
## How to add the extension to your checkout
Navigate to your Shopify Admin and go to **Settings > Checkout**.
Press the **Customize** button.
* If you don't want to edit your live checkout, you can press the **Duplicate** button to create a draft version of your Checkout.
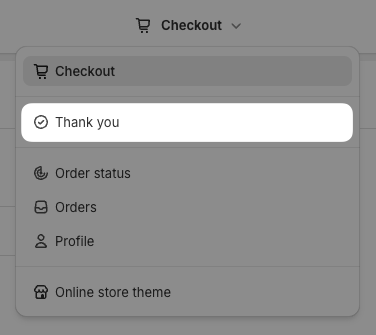
In the top middle of the Checkout Editor, press the **Checkout** dropdown and select the **Thank You** page.
**Make sure your Referral program is set up before getting started.** Configure the program in the Lantern app first. You can keep it in draft mode while you customize the extension. [Get started with Referrals](/help/referrals/getting-started)
## How to add the extension to your checkout
Navigate to your Shopify Admin and go to **Settings > Checkout**.
Press the **Customize** button.
* If you don't want to edit your live checkout, you can press the **Duplicate** button to create a draft version of your Checkout.
In the top middle of the Checkout Editor, press the **Checkout** dropdown and select the **Thank You** page.
 In the bottom left of the Checkout Editor, press the **Add app block** button.
Select **Referral** from the list of App Blocks.
In the left side of the Checkout Editor, choose whether you want to enable Email and Social sharing options.
Email referrals require you to set up your email provider correctly before they will work. Learn how to [set up email sharing](/help/referrals/email-sharing) for Referrals.
Press the **Referral** button at the top left of the Checkout Editor to return to your page editor.
Place the **Referral** block wherever you want it on the page.
Click **Save** in the top right when you're done.
***
## Customize your content
All of the content used in the Referral extension is fully customizable.
To edit the content for this block, navigate to the **Online Store > Content** area in your Lantern app in the Shopify Admin.
### Content variables
You can view the available variables for the Referral block content on the Content Variables documentation page.
[See Referral variables](/help/referrals/content-variables)
***
## Common questions (FAQ)
#### How do I upgrade my Thank You and Order Status pages to support extensions?
This [migration guide from Shopify](https://help.shopify.com/en/manual/checkout-settings/customize-checkout-configurations/checkout-extensibility) will walk you through how to update your Thank You and Order Status pages to support this extension.
In the bottom left of the Checkout Editor, press the **Add app block** button.
Select **Referral** from the list of App Blocks.
In the left side of the Checkout Editor, choose whether you want to enable Email and Social sharing options.
Email referrals require you to set up your email provider correctly before they will work. Learn how to [set up email sharing](/help/referrals/email-sharing) for Referrals.
Press the **Referral** button at the top left of the Checkout Editor to return to your page editor.
Place the **Referral** block wherever you want it on the page.
Click **Save** in the top right when you're done.
***
## Customize your content
All of the content used in the Referral extension is fully customizable.
To edit the content for this block, navigate to the **Online Store > Content** area in your Lantern app in the Shopify Admin.
### Content variables
You can view the available variables for the Referral block content on the Content Variables documentation page.
[See Referral variables](/help/referrals/content-variables)
***
## Common questions (FAQ)
#### How do I upgrade my Thank You and Order Status pages to support extensions?
This [migration guide from Shopify](https://help.shopify.com/en/manual/checkout-settings/customize-checkout-configurations/checkout-extensibility) will walk you through how to update your Thank You and Order Status pages to support this extension.